With the arrival of macOS Mojave, creating screencast videos is now easier than ever before. If you want to create educational videos with voiceovers, it is as simple as using the Shift-Command (⌘)-5 keys to get access to all commands. There is a myriad of on-screen controls that you can use to record your entire screen, capture screenshots or record specific parts of your screen. For those who have not updated their copy of macOS to Mojave, you can make use of QuickTime Player for creating screencast videos with voiceover.
For Users With macOS Mojave


If you have access to macOS Mojave, simply fire up your screenshot utility and you will be able to setup your screen recorder. Ensure that your microphone is connected and working before going ahead with the steps below.
- Open the screenshot utility from the Launchpad.
- You can also access the utility by searching for it from Spotlight.
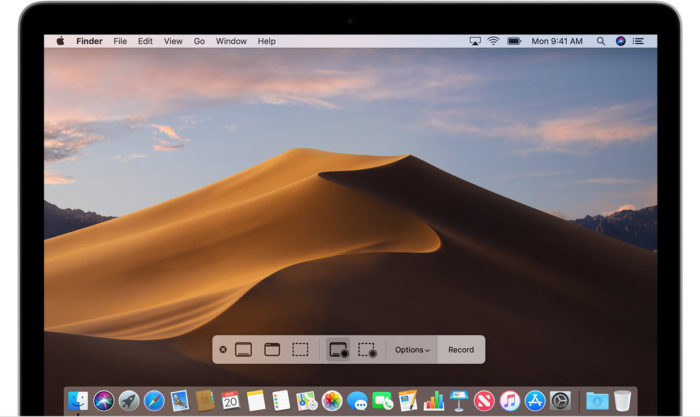
- From the screenshot utility bar, choose your desired screencast options.
- You can choose to record the entire screen, part of it, or take a screenshot.
- Once a screencast type is selected head to the Options menu.
- From the options menu, find the microphone option and enable it.
- If you want to use multiple microphones you can select one or multiple microphones as well.
Additional Settings
Here are the settings you can customize when screen recording.
Save To: You can change the default save location from this setting.
Timer: Allows you to set a delay and choose when the recording starts.
Floating Thumbnail: You can set a floating thumbnail on your video.
Remember Last Selection: Select all the options that were used in your previous session.
Show Mouse Clicks: You can use this setting to hide or display your pointer.
For Users without macOS Mojave


If you are not running the latest version of macOS Mojave, you can use QuickTime to record your videos. Here are the steps to record your screen:
- Open QuickTime Player from your Applications
- Head to File > New Screen Recording
- Click on the Settings button
- Choose your microphone and adjust volume settings
- Click on the red Record button to begin your recording.
- You can stop the recording from any screen by pressing Command-Control-Esc.
Once you complete recording, QuickTime will automatically open a contextual menu to let you edit or save your new video.