Destiny 2 is a free-to-play multiplayer FPS video game, developed by Bungie and released across the majority of gaming platforms. The game takes place in a complete sci-fi world, which is usually shared by several online players. As a Guardian, you work to protect Earth against invasion by several different alien races.
What is the Vault of Glass?
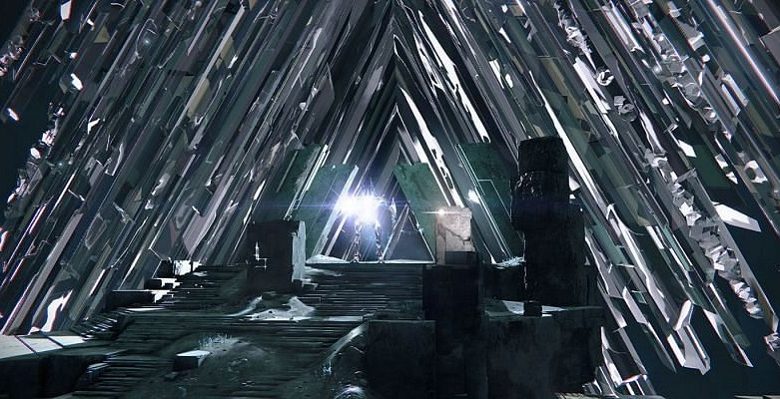
The Vault of Glass is both a stronghold and a Raid on Venus, originally released to Destiny in September 2014. It was re-released with a revised version on Destiny 2 in May 2021, bringing one of Destiny 1’s hardest challenges to a newer gaming population.
The Raid focuses on breaking into the Vault of Glass, oftentimes called the “most challenging experience that Bungie has ever created.” It’s notorious for its incredible difficulty, originally taking several hours upon hours to complete the raid. The entrance to the Vault itself has been known to take upwards of 45 minutes to crack alone. With several more rooms, traps, and puzzles within the Vault of Glass, it’s routinely been a great late-game achievement for higher-level players.
How Does the Vault of Glass Raid Work (and what are some tricks)?
The Raid is divided into five major sections, each of which poses its own challenges with individual solutions:
- Walking Ruins
- Templar Encounter
- Gorgons’ Labyrinth
- Gatekeepers
- Atheon
Walking Ruins:
To first make it into the Vault of Glass, you have to break in through the Walking Ruins. Players have to activate 3 Vex plates outside of the Vault’s front door for it to open. If that wasn’t hard enough, there’s also the additional challenge of needing to keep them active for 5 minutes in a row, as the time builds up a vault-opening spire.
This section works as a Capture the Flag game mode, as the plates are captured through teammates’ positioning on them with a lack of nearby enemies. Luckily though, once they’re captured, all you have to do is keep them so. At least until the Vault of Glass opens, in which you can move onto the next section.
Templar Encounter:
The Templar marks the first boss within the Vault of Glass. In a remarkably similar way to the Walking Ruins section, you have to defend three regions from waves of sacrificial Vex. By capturing and preventing Vex from sacrificing themselves to open confluxes, seven Oracles will appear, with them needing to be defeated.
Once the Oracles spawn, they will immediately start tagging players with the Mark of Negotiation every ten seconds. When left alone, this mark means immediate death as the Templar will clear out every player with the debuff. To clear the Mark, all you have to do is cleanse yourself in the middle pool of life. Luckily for you, the Oracles won’t attack or move, although it’s incredibly important to get rid of them before they mark you or the spawned Hobgoblin snipers get to you.
Following the defeat of the Oracles, The Aegis will spawn, a Relic shield. This shield is incredibly important to win this section, and it even serves some offensive and defensive uses. That’s great, especially as the Templar appears as soon as you pick up the Relic, which can only be attacked with The Aegis’ super ability which damages the first target it locks onto. Throughout this section, you have to attack the Templar with the shield’s super ability and free your friends when trapped. Eventually, you’ll have the chance to wear down the Templar enough that you’ll move onto the next section.
Gorgons’ Labyrinth
Once you’ve moved past the Templar and its Oracles, you’ll pass into the Gorgons’ Labyrinth. You can pass into this maze by standing at the stairs on the left side of the arena and finding a crack to your right. Entering the maze, you’ll quickly fall into a large chasm, which needs to be survived. Lucky for you, this chasm is the beginning of the maze, full of Gorgons which will wipe your raid if you you’re spotted and don’t destroy it within ten seconds.
To make it through the Labyrinth, move to the left side of the rock that you see in front of you when you land. Taking that passage, turn left again, crossing the hall you’ve in. Once you’ve climbed to the top of the rock, on your right side you will see a wall. Follow it to safely exit the labyrinth.
There is a puzzle though, which requires you to jump back and forth between floating platforms that appear and disappear. Following the section and being careful can help you across, especially if you double or triple jump your way across. Passing these puzzles and escaping the labyrinth will finally net you a trip to the fourth section.
Gatekeepers
Reaching the next major boss, Atheon, requires you to defeat three Gatekeepers; past, present, and future. Luckily, the fight begins immediately. The first Gatekeeper is in the room as you enter, in addition to some supporting enemies. We recommend you take care of the supporting enemies before attacking the Gatekeeper directly.
After defeating the first Gatekeeper, you’ll have the choice of two portals. The left leads to Mars in the past, while the right leads to Venus in the future. These portals are accessible through sync plates, which follow the same Capture the Flag routine. Once you begin to capture a sync plate, Praetorians will spawn and try to take the areas back. You should leave a few Guardians behind to take care of these sync plates to ensure they don’t close, and everyone dies.
As you defeat the Gatekeepers, you’ll receive some Relics which will be used to defeat the growing waves of enemies more efficiently. Eventually, you’ll defeat all three Gatekeepers moving onto the last stage.
Atheon
Welcome to the final boss in the raid! You’re almost to the end. First, though, you have to defeat Atheon, easily the hardest boss yet. Almost immediately, he’ll take three of your Guardians, teleporting them to either Mars or Venus. Once there, they’ll be forced to fight enemies to pass, every one of which is insta-killed by the Relics held.
Back in the main room, you’ll have to defend against growing waves of enemies as you stack on a sync plate to reopen the portal to either Mars or Venus. Once they’re open, your teammates can come back through in preparation for the final fight, one which can take place pretty soon in this section.
When everybody’s back to Atheon’s area, the team can group upon him, dealing heightened damage. It’s the easiest to gather in the center of the arena, piling damage exclusively on Atheon. Relics work the best against this boss, dealing extreme damage and adding supporting power with cleansing abilities.
Atheon will likely teleport other teammates to the planets soon afterward, meaning you’ll have to repeat this section until you finally defeat Atheon and reap the rewards.
Beating the Vault of Glass
Even with our guide of the different sections of the Vault of Glass Raid, in addition to some tips on how to beat and pass by each boss, the raid still isn’t classified as easy in anybody’s eyes. That’s why we recommend Boosting Ground, the top boosting service for several of the most popular games.
They even offer Vault of Glass-specific services, where professionals can help you pass one of the hardest challenges in Destiny 2. There’s also PvP and PvE boosting, weekly challenges help, and much more. It may seem weird to ask for help gaming, but it’s nothing to be ashamed of, so we recommend you check out their Destiny 2 boosting services.