High CPU Usage Windows 10: Fix Tiworker.exe CPU Usage Issue
A few things you can do before starting with a fresh installation of Windows 10!
Tiworker.exe is a system-based process responsible for configuring Windows updates by replacing old and corrupt system files with newly downloaded components via Windows Update and some users dropped complaints that this process is having high CPU usage on Windows 10 resulting in system slowdowns.
Tiworker.exe should consume a large portion of CPU only when it is installing a massive update. In this guide, we will walk you through the steps for fixing high CPU usage by Tiworker.exe on Windows 10. It’s highly recommended that you follow these troubleshooting steps exactly in the order they are mentioned.
Steps to Fix High CPU Usage on Windows 10
You probably know what to do before starting off with the first step below. That’s right! Reboot your PC and let’s get started!
Step 1: Manually Run System Maintenance Troubleshooter
Although Windows 10 has a fixed schedule for running System Maintenance Troubleshooter for fixing corrupt system files, the previous maintenance session on your system might have been interrupted because you shut down your system. Therefore, manually run this troubleshooter and let the whole process be completed. You can keep on working while this maintenance occurs in the background and of course, do expect some turbulence in your system’s stability.
Running the System Maintenance Troubleshooter for fixing high CPU usage on Windows 10 gets the job done 7 out of 10 times.
Don’t forget to check out! How to Download Twitch Clips
Type ‘Control Panel’ in the search box then hit Enter. Switch to viewing ‘Large Icons’ as it’s easier to locate the ‘Troubleshooting’ tab this way. Under this tab, you will a list of options on a pane to the left. Choose ‘View All’ for a list of all possible troubleshooting options. From this list, click on ‘System Maintenance’ then click ‘Next’ in the window that appears. Sit back and grab a coffee while the maintenance thing is occurring. You will have to grant administrator permissions in case you get the prompt with ‘Yes’ and ‘No’ options. Upon competition of this maintenance, close the troubleshooter and see if the high CPU usage issue has gotten fixed.
Step 2: Manually Run Windows Update
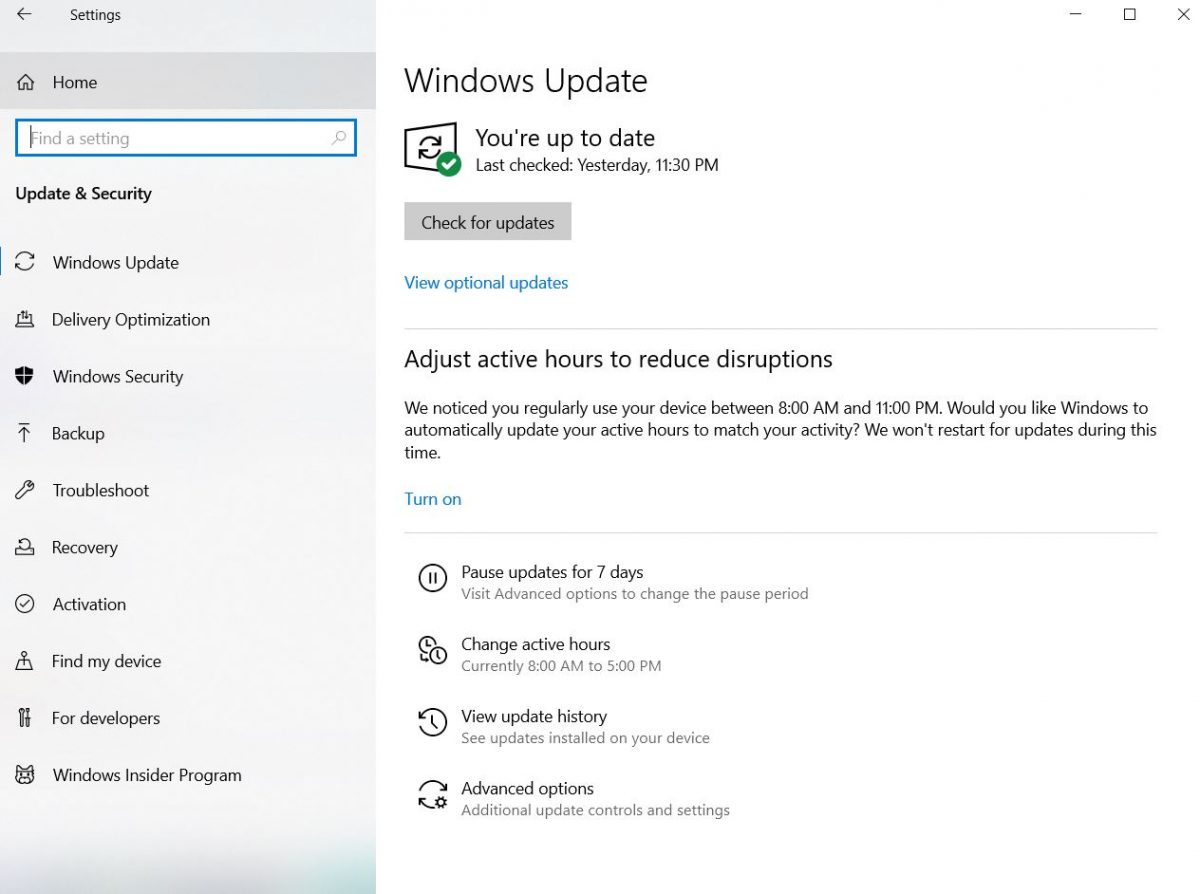
Windows 10 has been designed to automatically download and configure updates in the background but it often fails to do so. You will have to head into ‘Settings’ and click on ‘Check for Updates’ to ensure all the latest patches are installed.
Priority Configuration to Fix High CPU Usage on Windows 10
Step 3: Set Low Priority for Tiworker.exe
Settings the priority for Tiworker.exe to low ensures that other resource-hungry applications get to fetch most of your CPU’s power and at least, your system won’t act sluggish. However, you will run the risk of updates being configured wrongly (or not being configured at all) since one of the most important processes for getting updates has been given low priority.
For setting priority levels for Tiworker.exe, head into the ‘Processes’ tab in task manager, right-click on Tiworker.exe then choose ‘Low’ in the ‘Set Priority’ option.
If your system does not have all the latest updates configured well or a recently downloaded update has not been fully installed, Tiworker.exe will probably utilize a large chunk of your CPU for finalizing update configuration. Manually check for updates from ‘Settings’ and let the system finalize everything. How do you know if all updates have been configured properly? You will see a green checkmark under ‘Windows Update’ tab in Settings.
Step 4: Get Rid of Update Cache
For fixing anything related to system update on Windows 10 (Tiworker.exe using a whole lot of your CPU, for instance), nothing else would be better than clearing cached update files. Here’s how you can get rid of cached update files on Windows 10.
Recommended for you! Learn How to Unblock Someone on Snapchat in 7 Simple Steps
In the search bar, type ‘services.msc’ then press Enter to bring up the list of services currently running on your system.
‘Windows Update’ service (listed towards the end of this list) allows your system to detect, download and install updates for Windows and other programs. Right-click on this service then select ‘Properties’ to access its advanced options. By default, the service’s status will be running but you will need to click on ‘Stop’ then on ‘Apply’ for fulling terminating the service before making changes to cached update files.
Now, on the main directory where Windows 10 has been installed, follow this route:
(Windows Installation Directory):\Windows\SoftwareDistribution\Download
Inside the ‘Download’ folder, select all the items and delete them (from Recycle Bin as well).
Restart Windows Update service (can be done from the same window where you stopped the service earlier) then reboot your system to check if everything’s fallen in place.
A Fresh Install Always Gets the Job Done
If all steps mentioned above fail to reduce Tiworker.exe’s high CPU usage issue, you will have to start with a fresh installation of Windows 10.