Unable to find the option to permanently disable Windows Defender in Windows 11? You just found the guide that teaches you how to find that option!
Windows Defender, also known as Windows Security among most Windows 11 users, is an antivirus application that comes built into the operating system. This antivirus is not the best antivirus out there and most of the users know that very well. Even if it’s not the best antivirus application available, it can, nevertheless, defend your system from the most dreaded viruses.
We suggest that you don’t disable Windows Defender unless you have a third-party antivirus application installed.
Disable Windows Defender
Windows Defender is the default antivirus program for Windows 11. That’s because the antivirus is specially designed and maintained by Microsoft to prevent malicious apps from invading into a Windows system. If you want to install an app that Windows Defender is blocking but you are pretty sure it’s a harmless application, you can go ahead and disable the antivirus temporarily. To do that, follow these steps!
- First of all, launch the Settings app. Click the ‘Windows’ button and type ‘settings’ in the search box then press the ‘Enter’ button.
- After Settings is up, go to ‘Privacy and Security’ tab.
- Click on ‘Windows Security’. It will be on top of the list.
- After that, you will run into a tab that says ‘Open Windows Security’.
- After the application’s window is open, click on ‘Virus and threat protection’ tab.
- you will now find ‘Manage settings’ button (highlighted in blue) under the ‘Virus and threat protection settings’ heading.
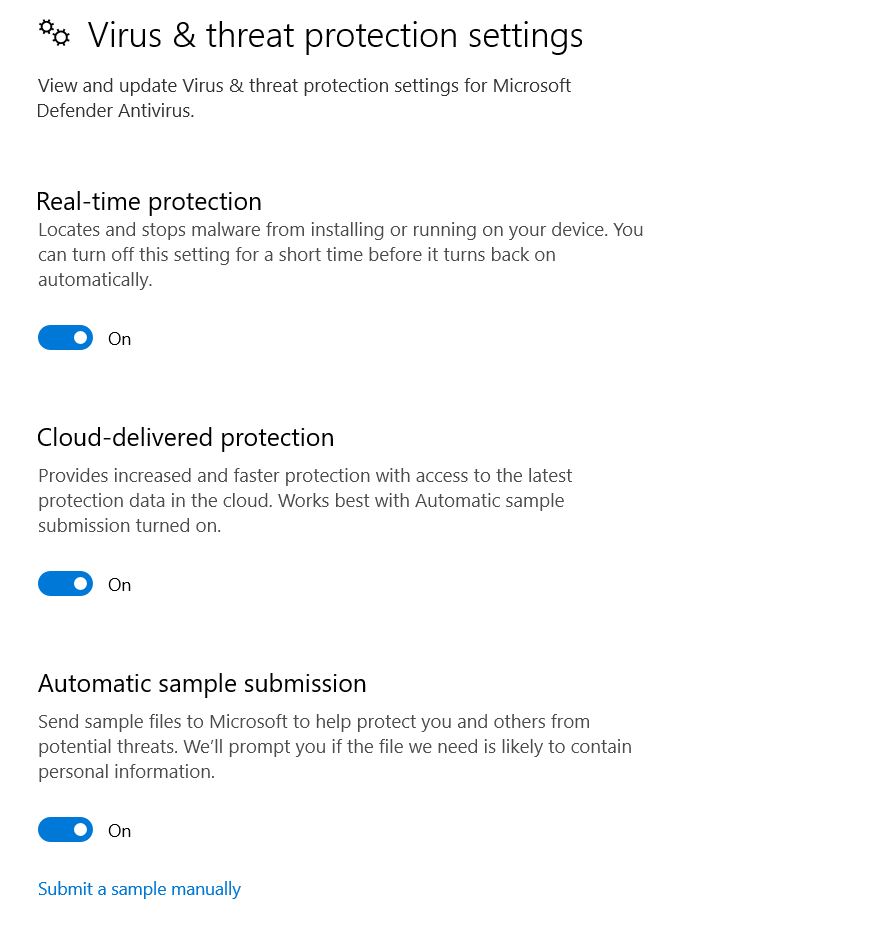
In the next window, you will see a bunch of different switches, which are all set to ‘On’ by default. The switch for turning off real-time protection is at the top.
Also read! Friends Network Unreachable Steam Error: Let’s Fix it!
If you want to turn off the antivirus temporarily, click on the ‘Real-time protection’ switch. Doing so will turn the antivirus off and it won’t detect any viruses when you download or try to install anything.
Again, remember that turning it off will only work for some time. If you want to install any unverified application downloaded from the web, a temporary disabling of real-time protection is all that’s needed to parry the blockage from Windows Defender. After some time, the switch will turn itself on and your system will remain protected. If you shut down other features, however, they won’t turn themselves back on.
Why Windows Defender in Windows 11?
If you no longer wish to be embraced under the protective quilt of Windows Defender, keep reading further. Keep in mind that you will be able to disable Windows Defender permanently only if you are running Windows 11 Pro. No other edition of Windows 11 will let you disable Windows Defender.
Before disabling the only antivirus application in your system permanently, you have to get things on track with Tamper Protection. Tamper Protection keeps malicious applications from messing with default Windows Settings. If you don’t disable Tamper Protection, you cannot disable Windows Defender permanently because the system will reenable all the security features required for Windows 11.
Recommended for you! How to Minecraft Series: How to Breed Horses in Minecraft?
Disabling Tamper Protection
Follow these steps to disable Tamper Protection in Windows 11.
- Firstly, click on the Windows button, and the awfully weird Start Menu will pop up. In its search bar, you have to type ‘settings’ then press ‘Enter’.
- Press on the ‘Settings’ icon to launch it in a separate window.
- Head to the ‘Privacy and Security’ tab.
- The next step is to click on ‘Windows Security’ tab.
- See a button for ‘Open Windows Security’? Click on it.
- The ‘Windows Security’ app will launch and the very first tab i.e., ‘Virus and threat protection’ is your next stop.
- Again, click on ‘Manage settings’ just like when you temporarily disabled Windows Defender earlier.
- After you are in the ‘Manage settings’ section, you will see the switch under ‘Tamper Protection’ is on (last switch on this page).
- Turn that switch off!
Shutting Down the Antivirus Completely
After turning off Tamper Protection, you will have almost reached the moment you were waiting for. Let’s disable Windows Defender! Follow these slightly complicated steps.
- In the search bar of Start Menu, type in ‘gpedit.msc’ then press ‘Enter’.
- After opening ‘gpedit.msc’, make your way through Administrative Templates under Computer Configuration. In the Administrative Templates section, locate the Windows Components and find Microsoft Defender Antivirus in the list of items.
- Up next, right-click on ‘Turn off Microsoft Defender Antivirus’ and select ‘Edit’.
- By default, it should have been set to ‘Enabled’ and all you have to do is set it to ‘Disabled’.
- Click on ‘Apply’, then on ‘OK’.
- Restart your system for changes to take effect.
You should have at least one antivirus application protecting your operating system at all times. Disabling Windows Defender on Windows 11 is only a couple of clicks away but that leaves you severely vulnerable to attacks from a number of malicious applications circulating online. Always install applications using the .exe files fetched from valid websites or verified databases.