How To Use MSI Afterburner?
Unlock the full potential of your GPU with MSI Afterburner!

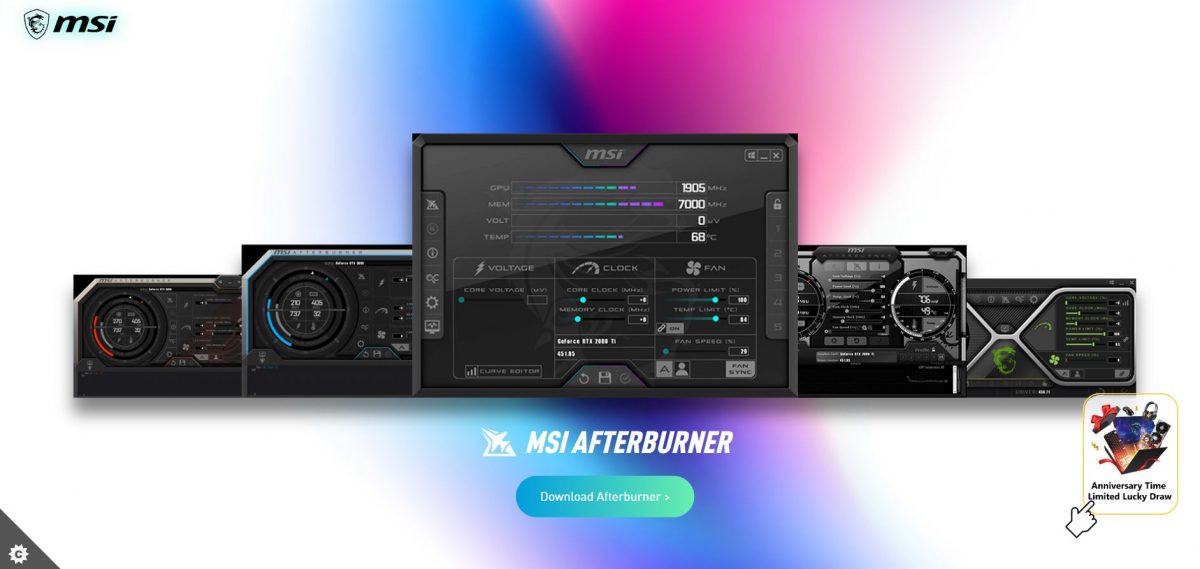
MSI Afterburner is an application developed by the GPU manufacturing brand MSI to help users get the most out of their graphics card. It helps with overclocking, benchmarking, monitoring in-game performance, observing hardware usage, and the like.
However, the software is compatible with every other GPU available in the market and is used widely across the globe by graphics professionals and gamers. In this article, we will be discussing some of the main attributes of this application and a brief guide on how to use them.
How to Download MSI Afterburner
The software is free to download on MSI’s official website.

Click on the MSI Afterburner download link to download the installer. After the download is complete, open the setup and follow the installation process step by step and you are all set.
Features
This application is a great tool for monitoring your hardware usage and tweaking voltage for overclocking GPU. Still, there are some other features, which are usually left unexplored but may help you in extracting maximum performance out of your GPU. Let’s take a look at those features.
Read next! Best Sniper Rifle Warzone: Who Wins? HDR vs AX-50 vs Dragunov!
Monitoring and On-Screen Display
This feature allows you to monitor your hardware usage, temperature, how much FPS you are getting, and voltage fluctuations, all in a graphical format. To get real-time statistics of all these aspects of your GPU, you can turn on the ‘on-screen display’.
Fan Control
Once done with monitoring the GPU temperature and usage, you might want to maintain a good temperature if it is too high. Also, temperature matters a lot if you want to overclock your GPU. That’s when the feature of Fan Control comes in handy. You will have to change the fan speed manually rather than letting it adjust on its own depending on varying temperatures.
To disable automatic fan control, click on the ‘Auto’ icon. After this, you can move the slider to set the required fan speed.
Screen Capture and Video Capture
The screen capture feature lets you take screenshots while in-game with the help of a pre-assigned hotkey. You can also set the quality of the screenshots that you want and also alter the save location from ‘Screen capture’ tab in the app’s properties.

Afterburner has its own video recording feature, which lets you capture in-game footage. You can assign the hotkeys for the start and end of video capture, change the video format, set the FPS limit, and even set the resolution at which the video will be recorded.
Recommended for you! DirectX Runtime Error Valorant: Fix it With This Tweak!
Overclocking
Overclocking may sound great as it can boost your GPU’s performance but at the same time, it can permanently damage your GPU if not done the right way. In the course of tweaking your GPU’s voltage, if you notice any kind of abnormal activity, it is advised to stop the process immediately. Overclocking is better done under the supervision of a person experienced in this field.
After downloading MSI Afterburner, you might want to try and overclock your GPU for the first time. So we advise you to progress step by step and not take a big leap to achieve maximum performance. In the beginning, you must try to make minimal performance differences to understand the nature and capacity of your GPU so that you can push it further.
Be sure to download and install Kombustor before you start overclocking your GPU. Kombustor helps you to monitor the GPU characteristics. In case any abnormal behavior starts to show up while overclocking, you will have to start reverting everything back to stock settings.
Steps for Overclocking With MSI Afterburner
- Firstly, launch MSI Afterburner, click on the ‘K’ icon to run Kombustor, and make sure it is always running in the background. After that, drag the ‘Power Limit’ and ‘Temp Limit’ sliders to maximum. Applying these settings will enable the GPU to consume more power and lets you push its limits.
You may notice extremely high temperatures after applying these settings but there is no need to worry as the GPU will not reach its borderline.
- In the next step, you will be increasing the core clock speed bit by bit to enhance the GPU’s power. It is advised to make small jumps of about 20-30 Mhz per step. Don’t forget to click the apply button every time after increasing the core clock speed. Check Kombustor to ensure that your GPU is stable with the load you are putting on it. Any unusual observations like glitches, flickers, crashes, pixelated images indicate that the GPU can’t perform with the current settings. You should start by decreasing the core clock speed until a steady frame is achieved. Start decreasing by 5Mhz per step and don’t forget to hit the ‘Apply’ button after making the change.
- The next step is to adjust the memory clock speed bit by bit, the same way you did with core clock speed. It is advised to raise the memory clock by 50-100Mhz per step. Keep increasing the speed and check Kombustor simultaneously to detect any unusual behavior. If the card starts to become unstable, start reducing the memory speed by 10Mhz per step.
- Once the GPU stops showing unusual activities, run the Kombustor test and keep it running for about 10-15 minutes to make sure there are no glitches or flickers. If you happen to come across any glitches, follow the steps above to reduce the clock speed bit by bit.
After you are satisfied with the settings, save the configurations on a profile by clicking on the save icon for future use.


